How to train your Dinosaur
Monday, October 22, 2018

Part 1 - Inception:
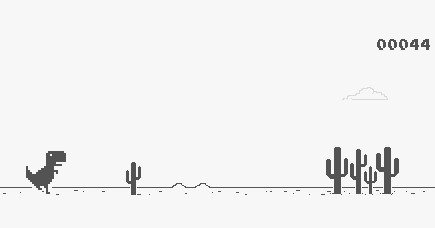
We have all seen the t-rex dinosaur game on the chrome offline page above. Agreeably it is a pretty fun game. But the problem was I couldn’t get past an average score. Being an engineer, I wanted to do something about it. I am no mathematician, I am not PhD, and neither do I hold multiple degrees. So I set out to find something with which I can hack my way in and use it for my own purposes.
The full code for the project can be found here.
Part 2 - Planning:
Our requirement is something like this - we need a program that processes the game frame by frame and uses a machine learning model that recognizes the frame of the game in which the obstacle is nearing the player (dinosaur in this case) and triggers a jump. For this, we need a classification model, which can take a frame as the input. The output of our model should have a value between 0 and 1, where zero means stay down and one means jump. We repeat this process for every frame of the game in real time and trigger jump when we receive the output as 1.
This quest led me to this article where the author teaches how to implement a handwriting recognition program using tensorflow and keras. (code)
Part 3 - Preparation:
This is the hardest part of the project, because it includes some actual studying, not just munching through the code like a caveman.
To make changes to the above program I had to understand how classifications usually work in machine learning. This led me to artificial neural networks. Neural networks can be used for solving classification problems. They use back propagation technique to get better at things. This blog has an incredible explanation about neural networks and the basics of back propagation.
The first step is to modify the handwriting code we have so that it can recognize only one number. This is to make sure that the model is capable of recognizing just one particular image. Anything else, and it outputs a zero.
If you take a look at the handwriting recognition code here, the model has four layers. One input layer - this has 784 neurons, two hidden layers and one output layer. The output layer has ten neurons, one for each digit. (What we need is the output layer to have only two neurons, one indicating 0 and other indicating 1).
Part 4 - Proof of concept:
Now it is time to check if what we are trying to achieve actually works. If we succeed to make this model recognize a single digit instead of all 10 of them, we can be sure that we can in theory make it recognize a different set of images that we are going to give it in the later steps.
As we discussed, let’s make some modifications to the handwriting recognition code so that it is able to recognize only one number, say 7. If you are anything like me, you’d want to have a peek at the finished code of a single digit recognizer before reading about it. Here is the code after the modification.
Let us see what all these modifications mean.
This is just for printing out the configurations of your setup.
sess = tf.Session(config=tf.ConfigProto(log_device_placement=True))
What was then called y_test, now I am calling y_test_old because we are going to call the modified test data set y_test later on. Same way, call y_train as y_train_old.
Then,
            indicesToKeep = []
            for idx, val in tqdm(enumerate(y_train_old)):
                if y_train_old[idx] == 7:
                    indicesToKeep.append(idx)

            y_train = np.zeros((60000,), dtype=int)

            for index in tqdm(indicesToKeep):
            y_train[index] = 1
We want the labels of our training data set (y_train) to contain only zeros and ones instead of it having a value from 0 to 9 as before. Now in y_train all the ‘1’s indicate images in the x_train which look like a 7 and all the ‘0’s indicate anything other than 7.
We want our output layer to have only 2 neurons. Output neurons indicate 0 and 1 respectively. If the first one gives high output then the output of the network is 0, and if the second one outputs a high value then the output of the network is 1.
Let’s make that change.
model.add(tf.keras.layers.Dense(2, activation=tf.nn.softmax))
We have our training data as we want it. Now we want to change the testing data set the same way.
            y_test = np.zeros((10000,), dtype=int)

            i = 0
            for eachValue in tqdm(y_test_old):
                if eachValue == 7:
                    y_test[i] = 1
            i = i+1
And that’s it. Now we have a program that recognizes only one single number. If the code that saves the model and re loads it doesn’t work, just comment it.
Part 5 - Game:
The first thing we need are the screen shots of this dinosaur game we are talking about, and lots of it. The idea is to take a screen shot for each frame of the game, and save a list of labels corresponding to each screen shot. The labels will be indicating whether to jump on that particular frame or not. We need to train our model on the ideal game play. This is because we want it to know the exact frame at which the jump needs to be triggered in order to pass the obstacle that is nearing. If we want to capture the screen shots of an ideal game, we need to play an ideal game. Playing with such high accuracy is impossible for humans. So we need to automate the game when we are capturing the training data.
The problem is this game is in the browser. I couldn’t make the browser save the screen shots directly to the file system. I couldn’t just take a screen capture video of the game play because I needed a list of labels telling me each screen shot is jump worthy or not.
These problems were a bit much, and boring. So I felt it would be way easier if I just implemented a similar, but smaller game myself. Then I would have all the freedom I needed to do whatever I wanted.
I did just that, and you can find the code here. This is similar to the game we see on the chrome page, but instead of the dinosaur and the cactus plants all we have here is blocks.
We are now ready to capture the screen shots for training our model. But to do that we need to automate our game, and then make the game save each frame along with an entry in a label file telling if the player jumps in that frame or not.
Once you understand the code for the game, it becomes pretty simple how to do the automation. Here is the code that both automates the game, and saves the screen shot on each and every frame along with its label. I have hardcoded the number of screen shots to be captured as 50000.
Part 6 – Data:
We have a model, and we have the data. If you open the dataset folder and see the samples you can see thousands of screen shots we just captured. The labels file just contains a list of image names and their corresponding “jump or not” flags.
We need to read these images one by one and create a dataset suitable for our neural network model. To do that we are going to use opencv. Opencv helps in manipulating the images to fit the model. Here is the code for loading these screen shots as our dataset, and training the model just as we were before with handwriting data, and then testing it with some more screen shots. If everything goes smoothly, you will end up with 2 more files called ‘model.yaml’ and ‘model.h5’. The yaml file contains the model we have created. The h5 file has all the weights of the neural network. We don’t have to train our model every time we have to run the model. We can just load these two saved files into our code and get going.
Next here is a small script to load the saved model files and test one more time just to be sure if the saved weights are loaded properly into the model.
Part 7 – Play:
Now all we need to do is put two pieces together. We already have a game that plays itself by measuring the distance of a nearing obstacle. And we have a model that predicts if a frame is jump worthy. We have to use this model to check if a frame is jump worthy in real time.
Here is the code that does just that.